Farming and using multiple accounts at the same time takes a lot of time for management. So, the Schedule Application tool will help you save time.
Tutorial How To Use Schedule Application Tool
Step 1:
Click on the “+” to create a new Task List.

Step 2:
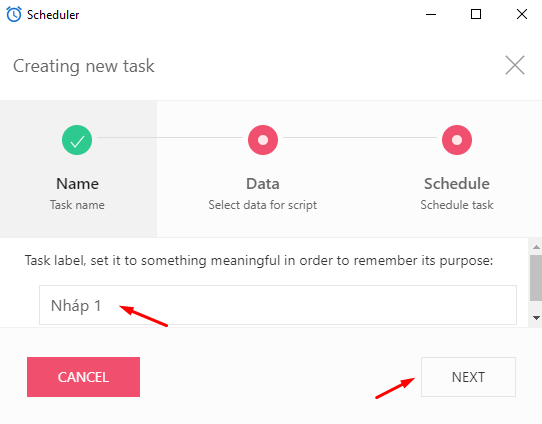
Enter a name and select “Next“.
Step 3:
Select “Input data” In the Data dialog box. Fill in the information as instructed here: How to use Run Now tool.
Select “Run” and “Next”.
Step 4:
Detailed time management settings are in this dialog box.
+ Run now: Run the software in real-time.
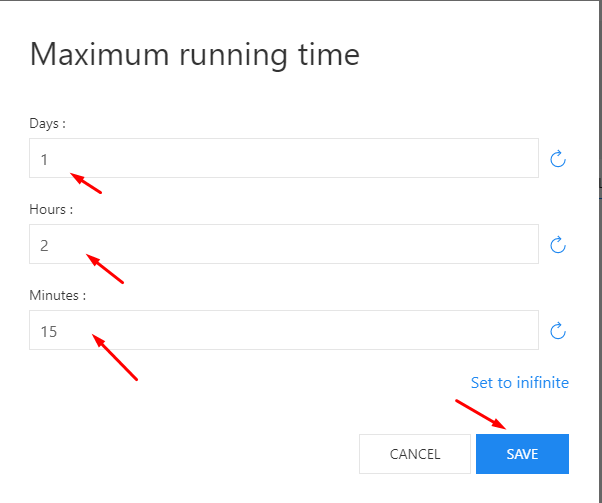
In the More settings section, select “Infinite“:

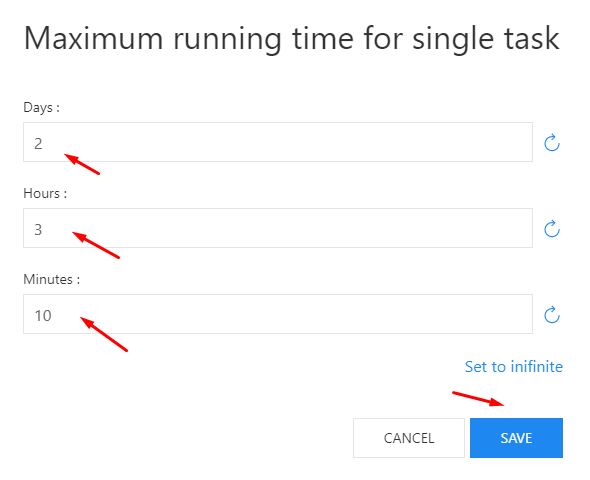
You can set the maximum running time from the current time. Enter the date, time and minute into the boxes as picture below, then click “Save“, then select “PREVIOUS“:
+ Run at:
Run at a custom time.
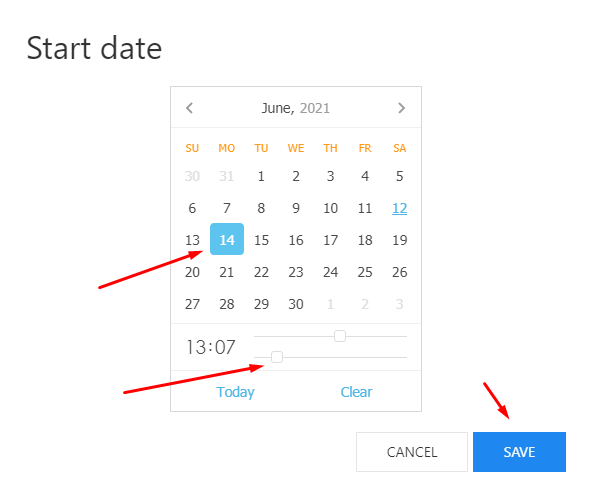
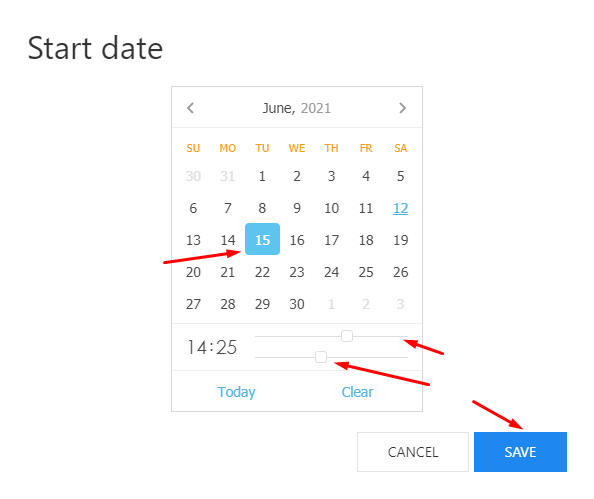
In the Run at section, select “Date not set“:

Start date dialog box will appear, choose time => Select “Save” => select “PREVIOUS“:
+ Run with interval: Random interval break software
In the “Interval between each task start” section, enter the break time between runs.
In the “More settings” section, enter the start and end times for the rest time between runs.
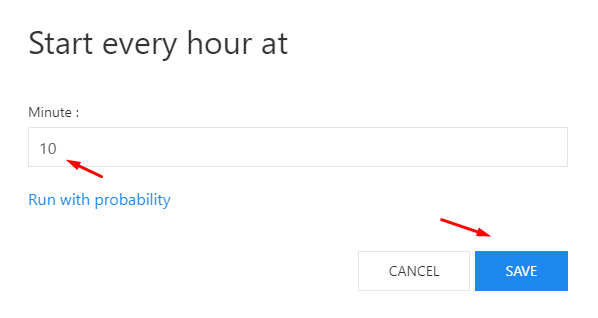
+ Start every hour:
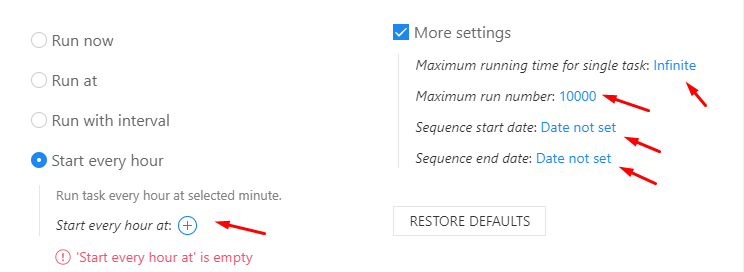
Every hour, the software will run according to the number of minutes that you have installed.
Click on “+”, you will see a dialog box as shown, enter the number of minutes that you want.
Choose the start time and end time in the “More settings” section.
Note:
- Maximum running time for a single task: Set up the number of days, hours, minutes to finish each run. The start time is calculated in real-time.
- Maximum run number: set up the maximum number of runs
- Sequence start date/end: Choose date, hour, minute to start/end
+ Start every day: Every day, the software will run according to the time that you want. Choose “+” to customize the time (Similar to the settings in “More settings”).
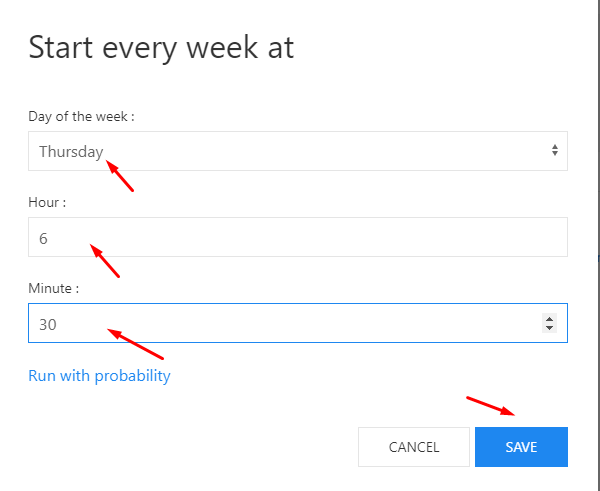
+ Start every week: Every week, the software will run according to the time that you want. Choose “+” to customize the time (Similar to the settings in “More settings”).
+ Start every month: Each month, the software will run according to the time that you want. At Start every month, select “+” to set up the time (start and end date/time in the current month).
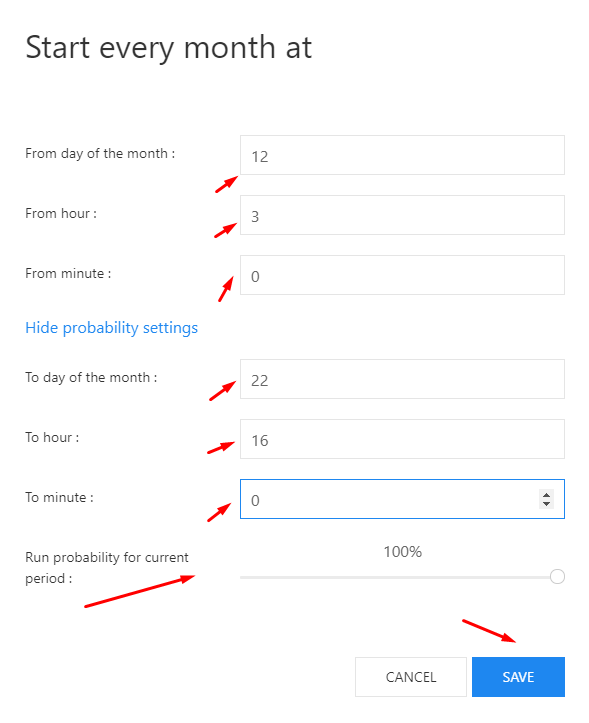
In the “More settings” section, enter the start and end times for other months.
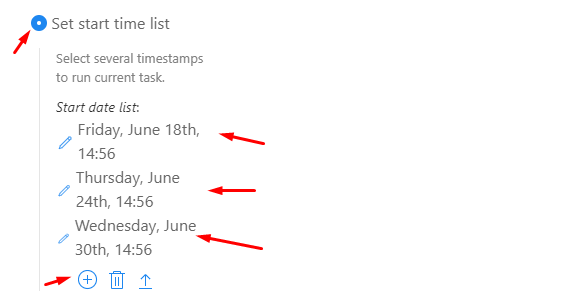
+ Set start time list:
Select the “+” to add hours, days, and months.
+ Sequence:
The software will run sequently according to “task list”.
After setting the time, select “PREVIOUS” => select “Save and close”.
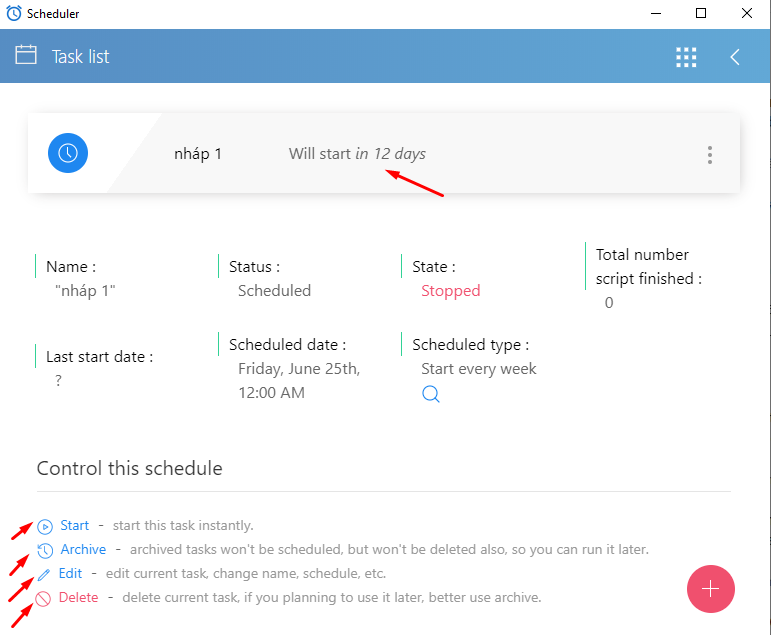
Step 5: View, edit, stop, delete Task list.
Select ![]() to stop, delete, view the activity of a task list:
to stop, delete, view the activity of a task list:
If you have any questions, please contact for the support.
Thanks for reading.
Contact info
Email: autobotsoft@gmail.com
FaceBook: https://www.facebook.com/autobotsoftsupport
Skype: live:.cid.78c51cd4e7238ae3
YouTube: https://www.youtube.com/channel/UCGftS8E3vX7IaUwg4GgDWDQ
Twitter: https://twitter.com/autobotsoft


