Advertising on Google is being widely used in businesses. However, Google Ads currently faces many restrictions and strict policies from Google. Our AutoCamp software will farm Google ads accounts to avoid getting suspended and auto add bulk campaigns, etc. to address these issues.
Main features of AutoCamp Software
- Multi-threads
- Support using Proxies to change IP
- Auto Register Google Ads accounts
- Add video campaigns in bulk
- Add Search campaigns in bulk
- Manage unlimited profiles and campaigns
- Farm gmail profiles to gain trust
- Each account is logged in different virtual devices
- Run multi-threads and proxy support
- Support add bank/card automatically.
Tutorial Video
How to use AutoCamp Software?
When you buy AutoCamp software, we will provide you with 3 links: software link, desktop useragent file and mobile useragent file. Download all these files and unzip the AutoCamp.rar then run the .exe file to open the software.
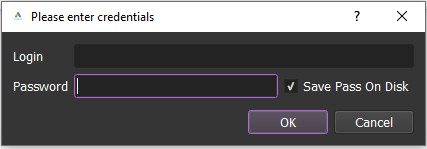
Use the provided license username and password to fill in Login and Password.
Click OK to login.
You choose one of two ways:
- Run now: Run the software instantly
- Schedule: Schedule the application to run at specific time

The following screenshot will show you all setting parameters of our AutoCamp software:

A- Introduction Of Each Function of AutoCamp Software
A1. Run
This is the number of times that you want the software to run. You can leave it as the default.

A2. Threads
The number of threads is the number of tabs, accounts, or windows that run at the same time.
Each thread will open a separate browser which has different fingering and IP. Provide number of threads that complies with your computer configuration.

A3. Accounts
Click “Data” to import the Google Ads accounts into the software.
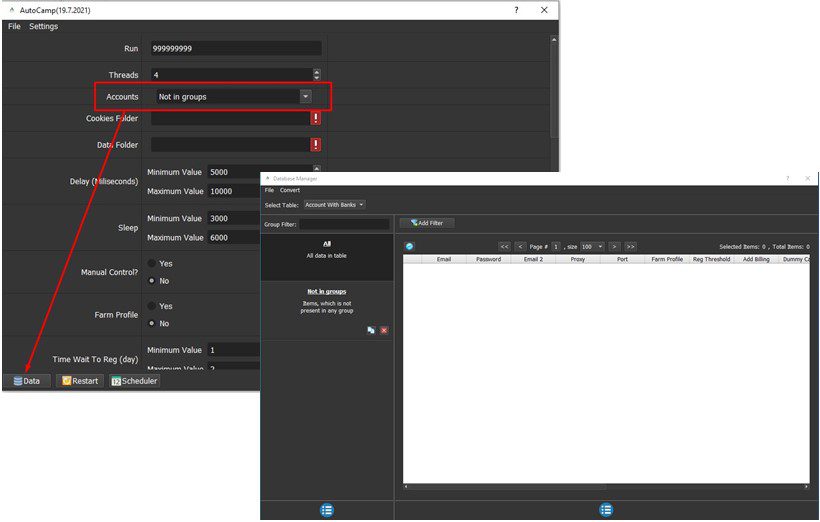
Choose one of two ways:
Option 1:
Create a text file that contains accounts. Accounts format is: Email,password,recovery email,proxy:port.
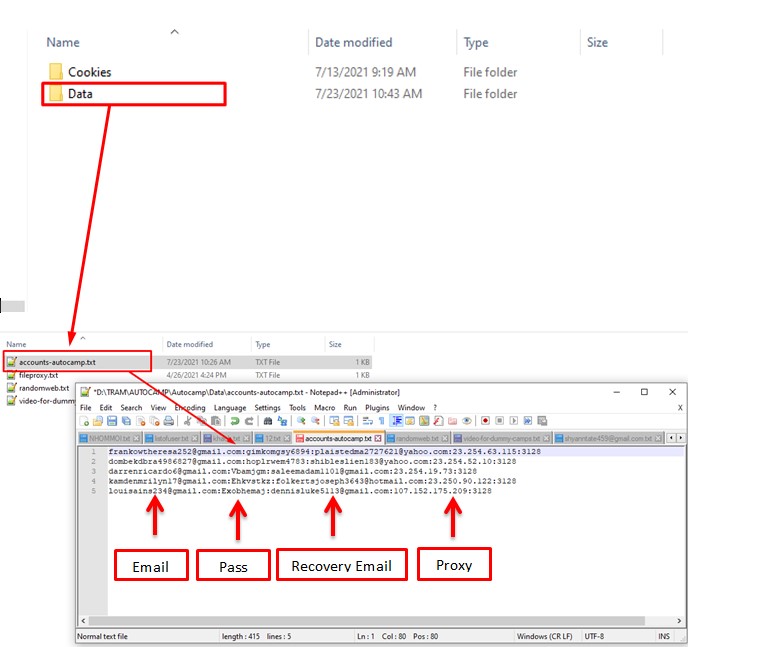
In the account management panel, click Convert ==> Import Csc ==> Select the file containing the accounts ==> OK.
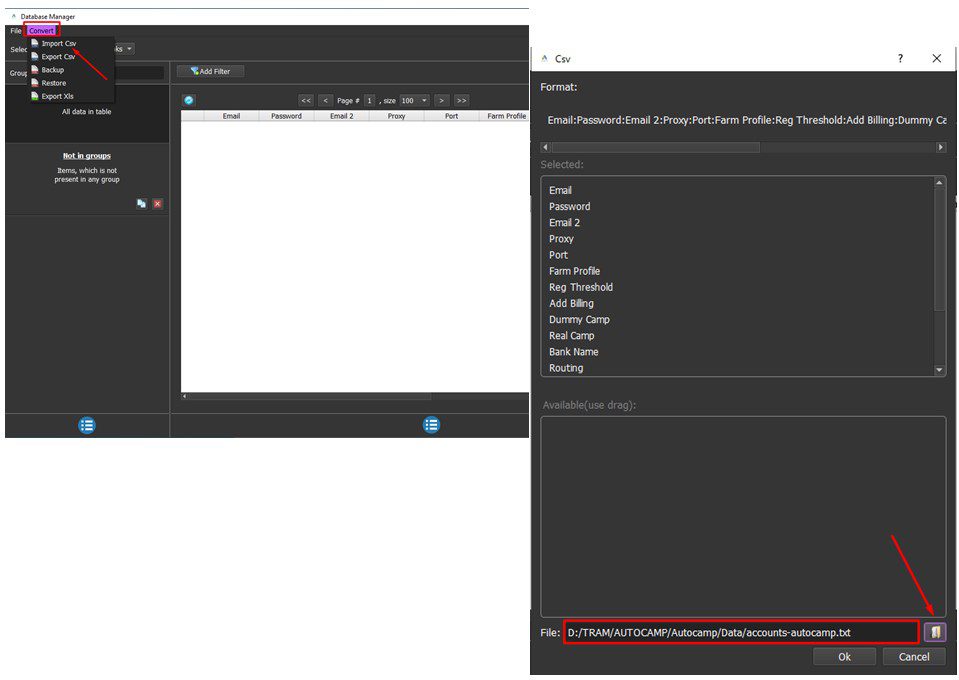
Option 2:
Click ![]() in the left corner of the account management panel ==> Add group ==> Enter group name.
in the left corner of the account management panel ==> Add group ==> Enter group name.
Click ![]() in the right corner of the account management panel ==> Add Item ==> Enter each item.
in the right corner of the account management panel ==> Add Item ==> Enter each item.

If you want to rename group, do the same as following screenshot:
Click ![]() => rename the group ===> Click “OK“.
=> rename the group ===> Click “OK“.

A4. Cookies Folder
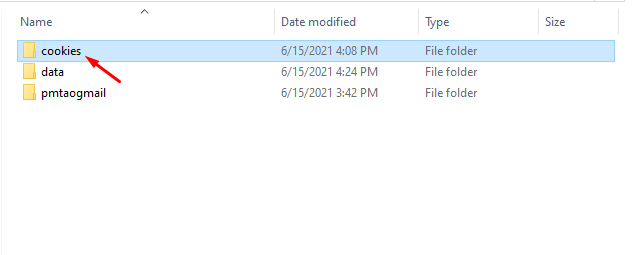
Folder Cookies is a place where the software will store cookies and profiles of the accounts. Software will use cookies and profiles for the next runs without logging back into accounts. Create a new Cookies folder on any hardware disk that you want to save cookies and profile and get the path to put into the setting as shown:


A5. Data Folder
Do the same as Cookies Folder.


A6. Delay & Sleep
- Delay: Time to delay between two actions.
- Sleep: Time to pause between two threads.
Note: Unit is millisecond (For example 30000 = 30 seconds).

A7. Manual Control
This is a manual function after accounts have been logged in. If you want to manual control, choose Yes, otherwise choose No.

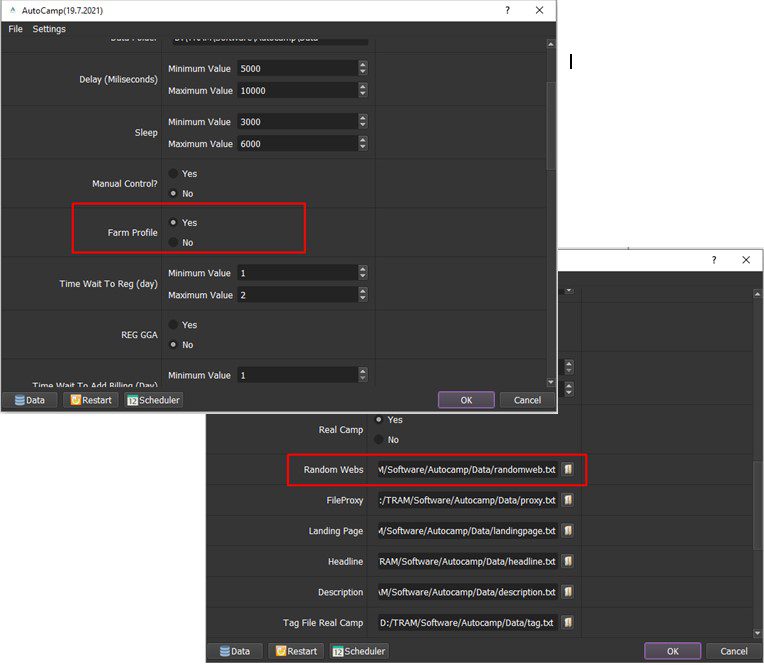
A8. Farm Profile
Farm Google ads accounts to avoid being locked out of your accounts

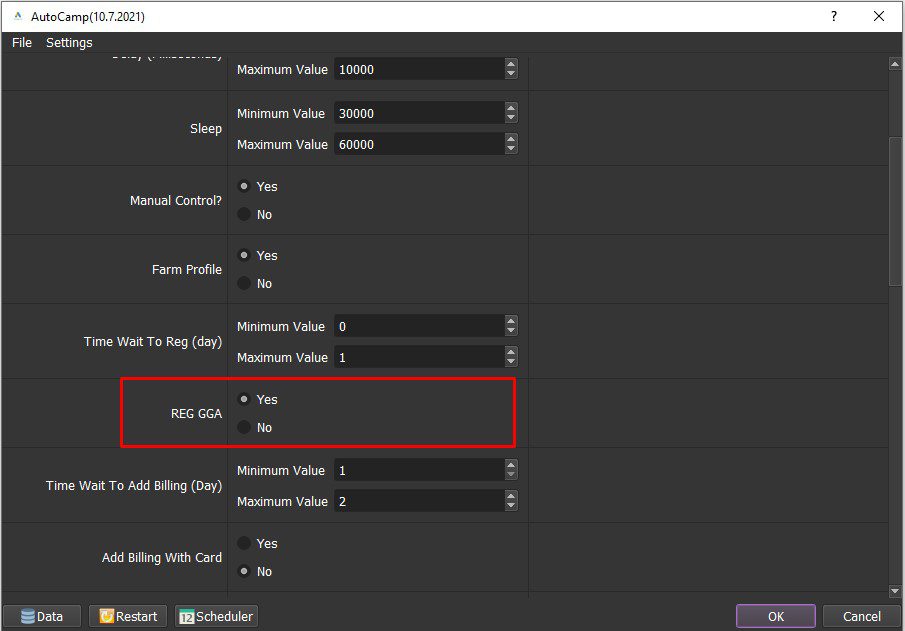
A9. Reg GGA
Reg GGA is a function to bulk register Google Ads accounts. In REG GGA, select Yes.
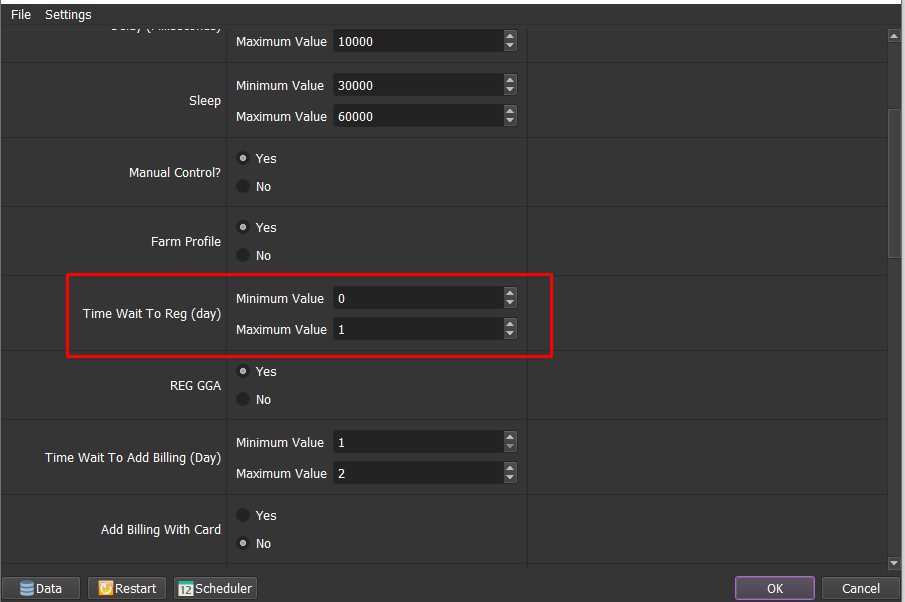
A10. Time Wait To Reg
This is time waiting to register Google Ads accounts (Unit is day).
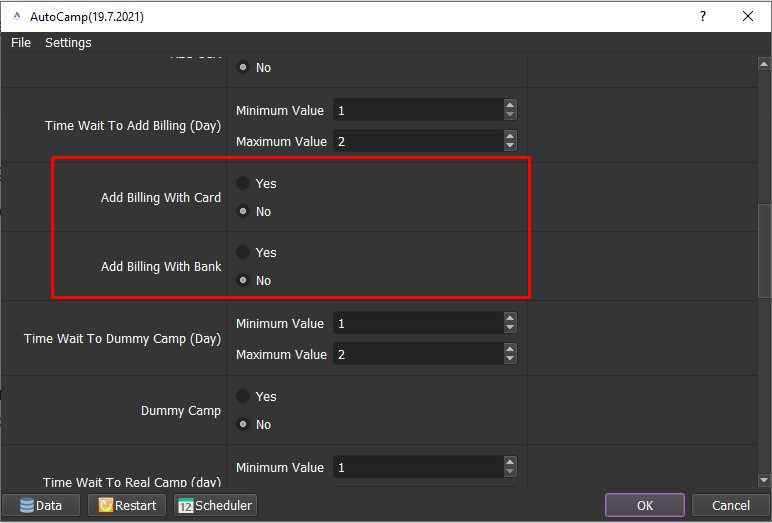
A11. Add Billing With Card & Add Billing With Bank
Choose Yes to add billing with card/add billing with bank, otherwise choose No.
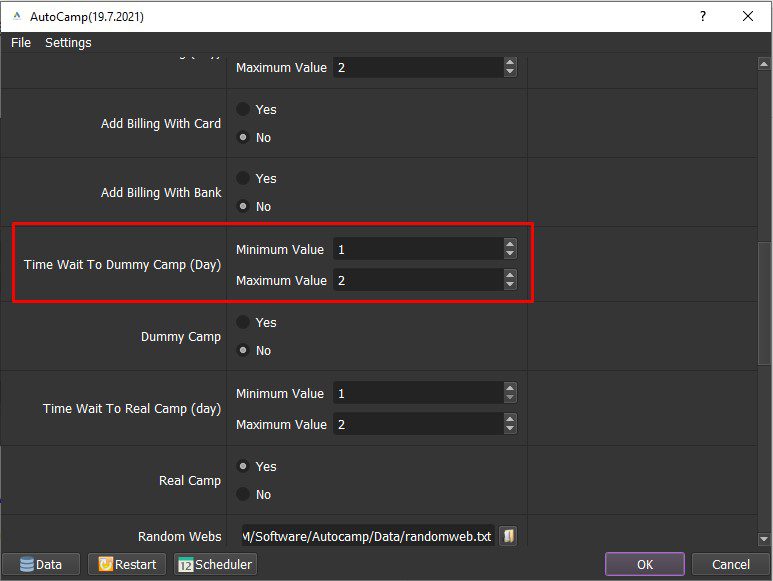
A12. Time Wait to Dummy Camp
This is the waiting time to run dummy campaign.
Note: Unit is day.
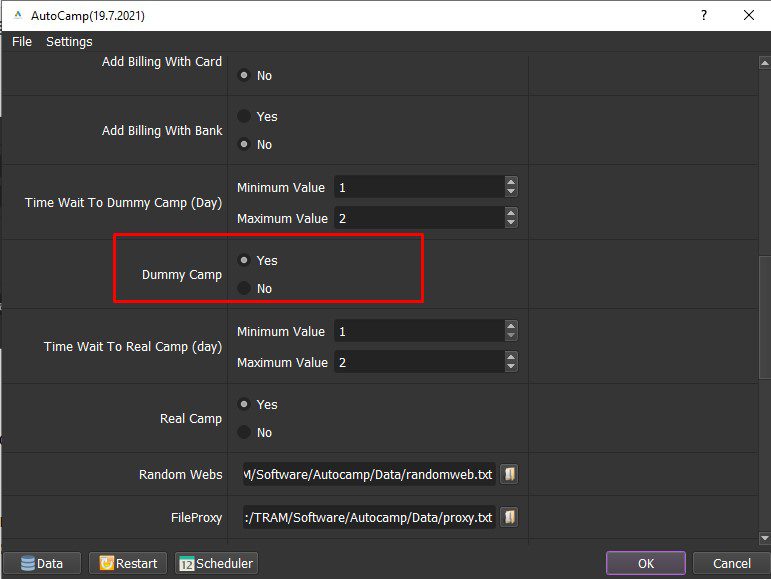
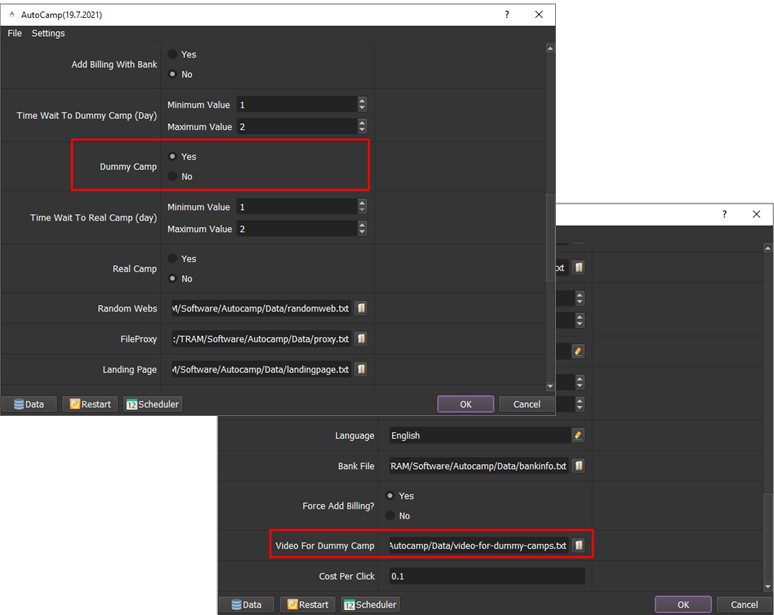
A13. Dummy Camp (Camp Video)
Select Yes to run dummy campaign, otherwise choose No.
Note: The waiting time to dummy camp in A12 section.
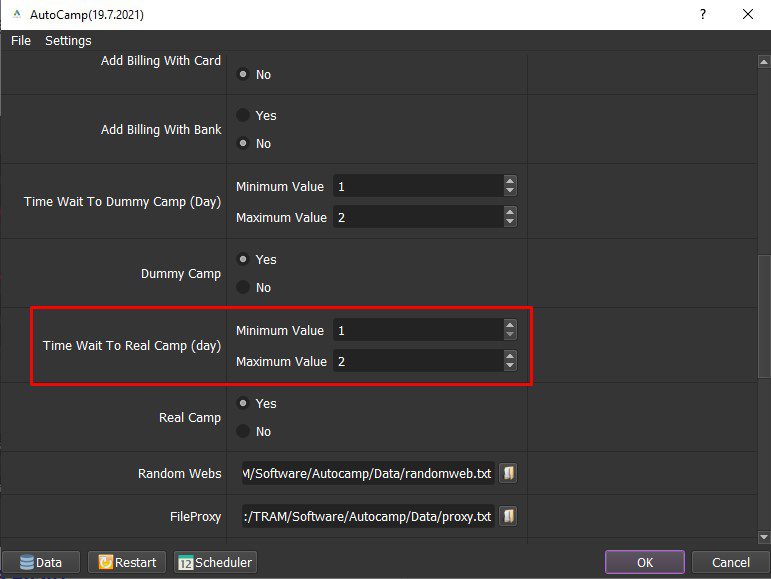
A14. Time Wait to Real Camp
This is waiting time to run real camp.
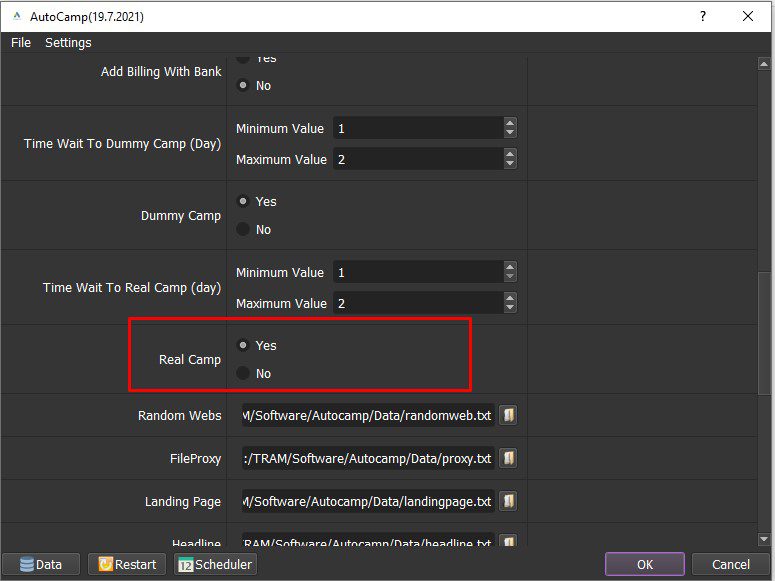
A15. Real Camp
Select “Yes” to run real campaign (Camp Search), otherwise select “No“.
Note: the waiting time for the real campaign is set in A14 section.
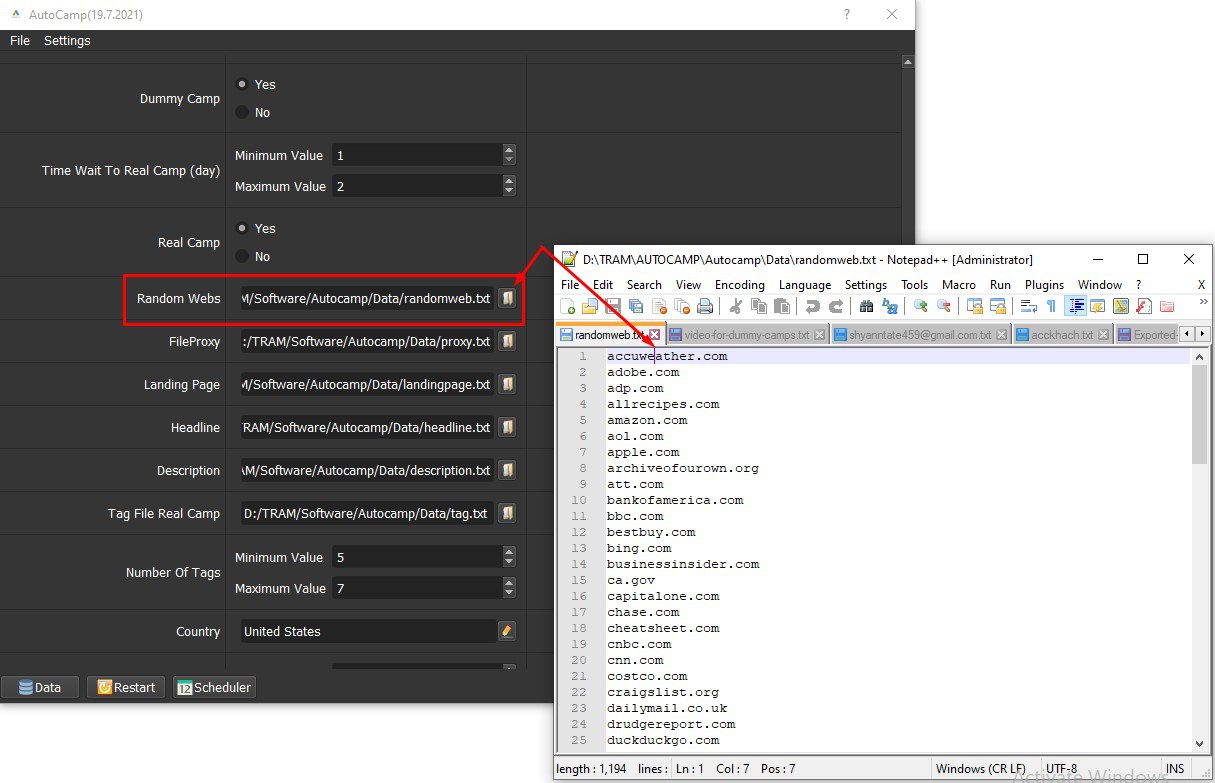
A16. Random Webs
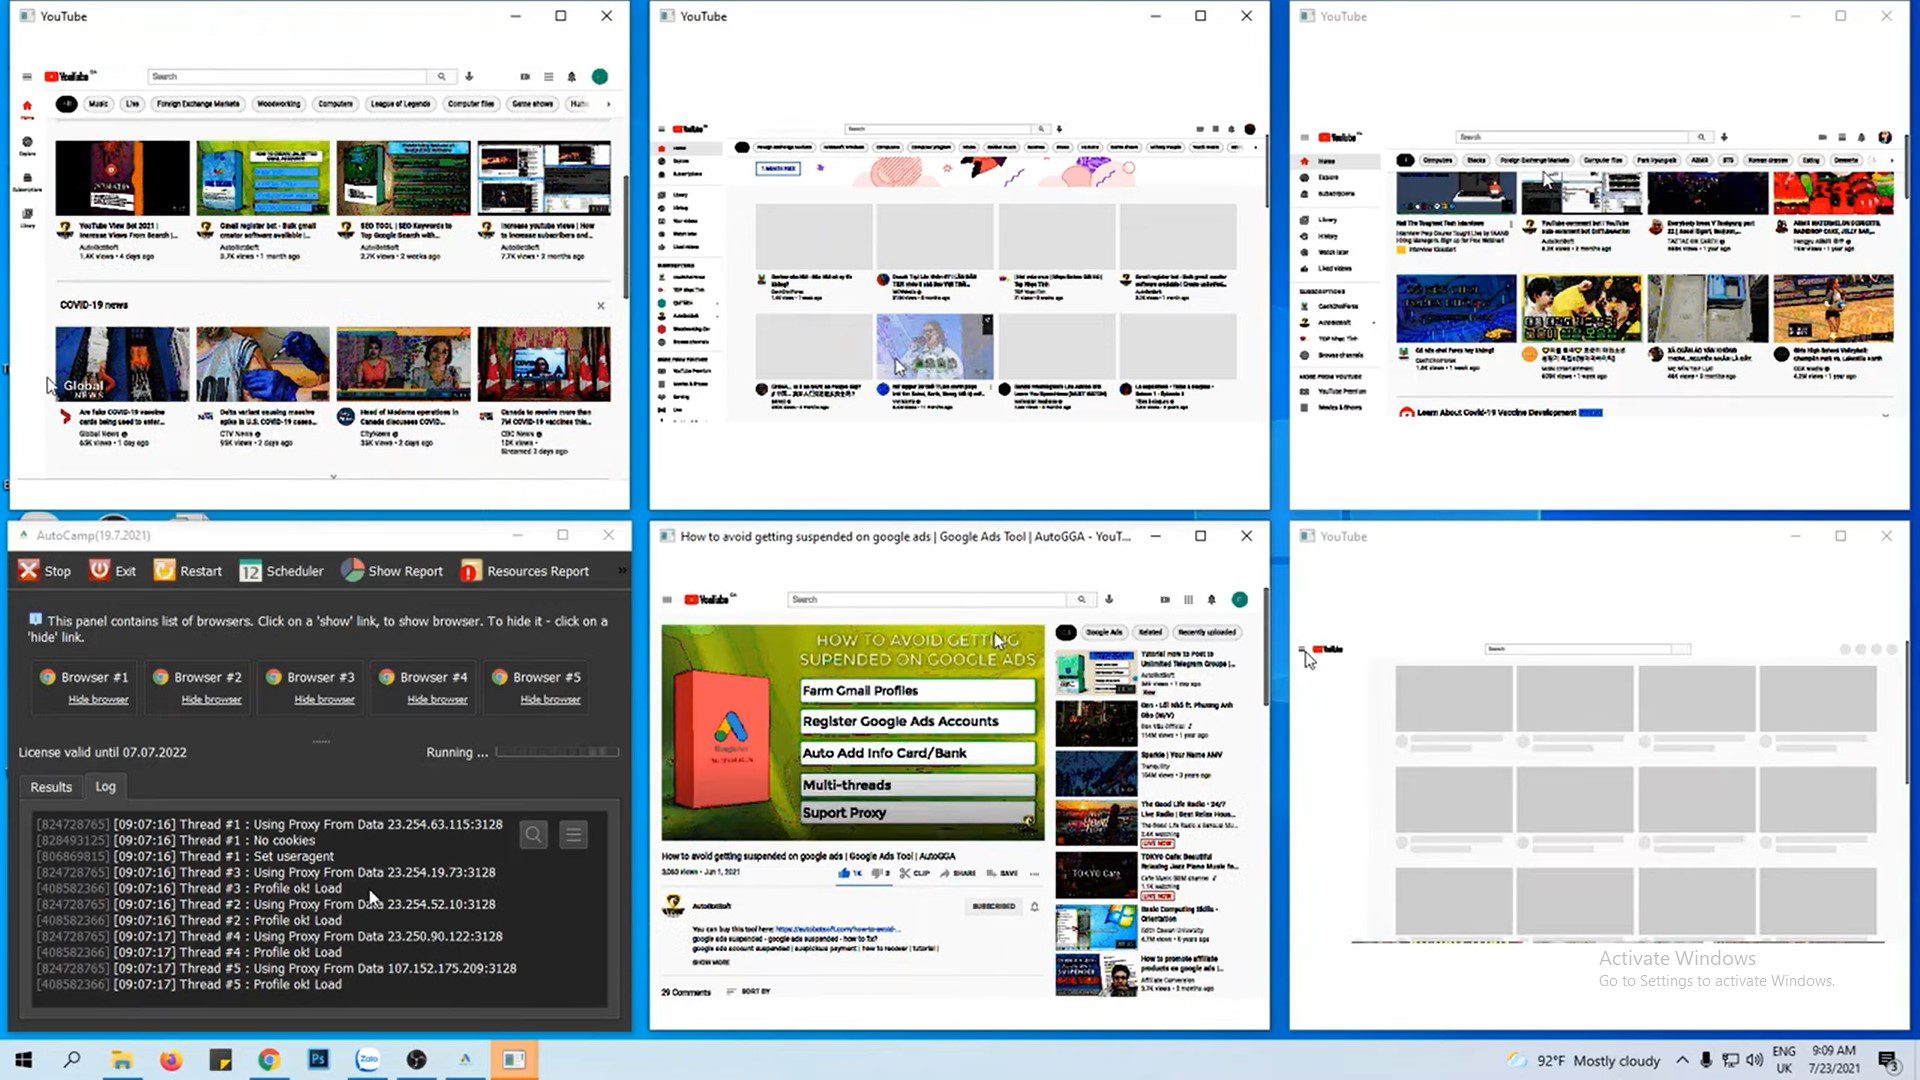
To farm Google Ads accounts, the software will click on websites to emulator real people.
Create a text file containing link of websites.
Click ![]() ==> select the text file containing websites.
==> select the text file containing websites.
A17. File Proxy
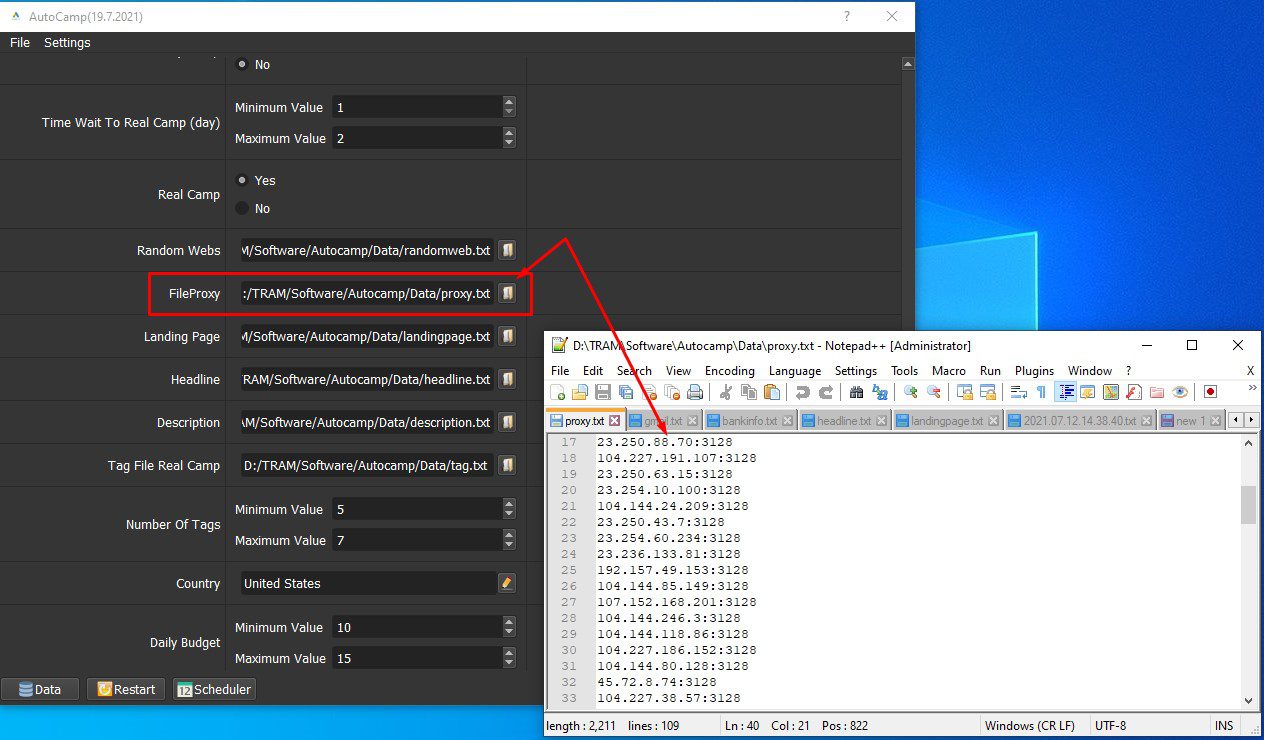
The software will default to receive the proxy in Data (tutorial input data in A3 section).
If proxies in the Data cannot be used, create a text file containing the Proxies. Each proxy per line in format: IP:Port:Username:Password. Leave username and password empty if your proxy doesn’t have username and password (Some proxies work with IP authentication instead of using username and password).
Click ![]() ==> select the file containing the proxies.
==> select the file containing the proxies.
A18. Landing Page; Headline; Description; Tag File Real Camp; Number of Tags
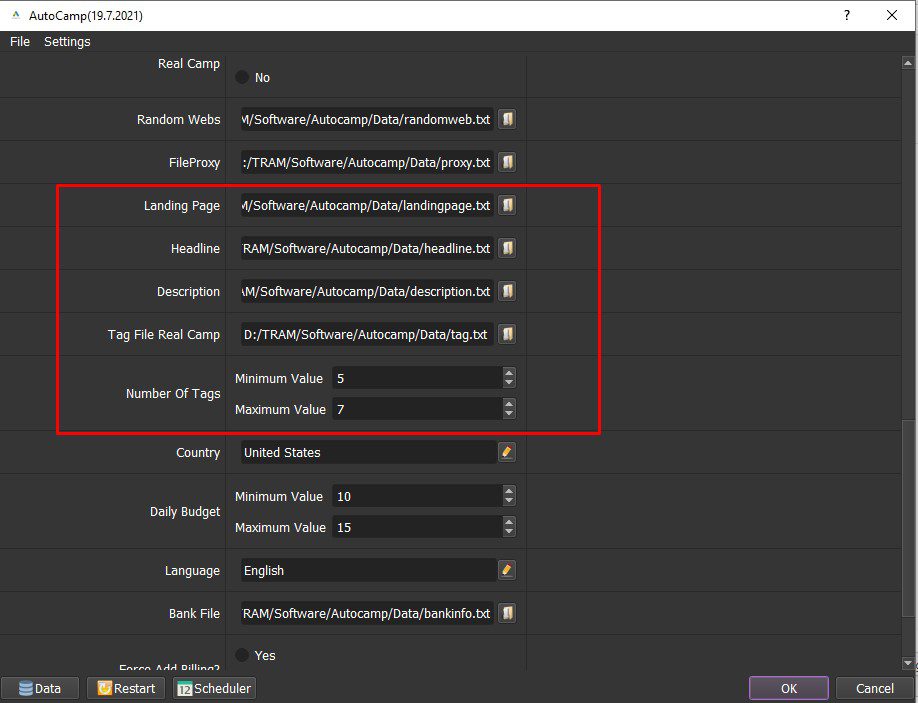
These are the items to run the real campaign function.
Landing Page: input the website that you want to advertise. Create a text file containing link of website, click ![]() ==> select the file containing the website link.
==> select the file containing the website link.
Headline: Create a text file containing headlines that you want to run ads. Click ![]() ==> select the file containing headlines.
==> select the file containing headlines.
Description: Create a text file containing the description, click ![]() ==> select the file containing descriptions.
==> select the file containing descriptions.
Tag File Real Camp: Create a text file containing tags for your ad campaign. Click ![]() ==> select the file containing the tags.
==> select the file containing the tags.
Number of Tags: This is the number of tags, the software will randomly select the number of tags. For example, in the following screenshot, the software will randomly choose 5-7 tags to run.
A19. Country & Language
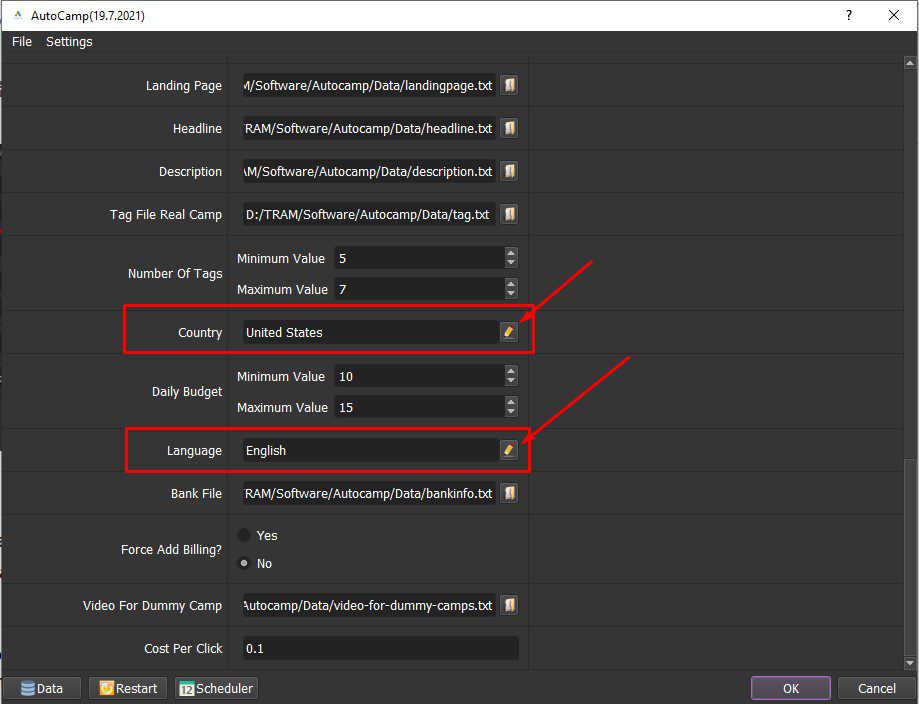
Choose the country and language for your ad campaign.
Click ![]() and change it.
and change it.
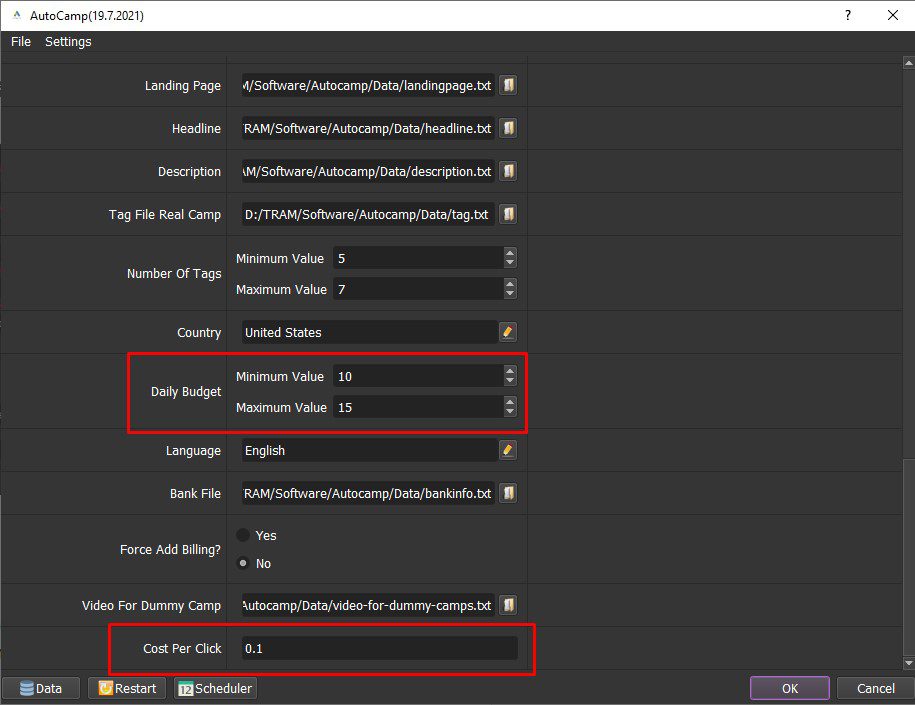
A20. Daily Budget & Cost Per Click
Set up these functions to add a daily budget and cost per click on the ad campaign.
Note: Unit is Dollar.
A21. Bank File & Force Add Billing
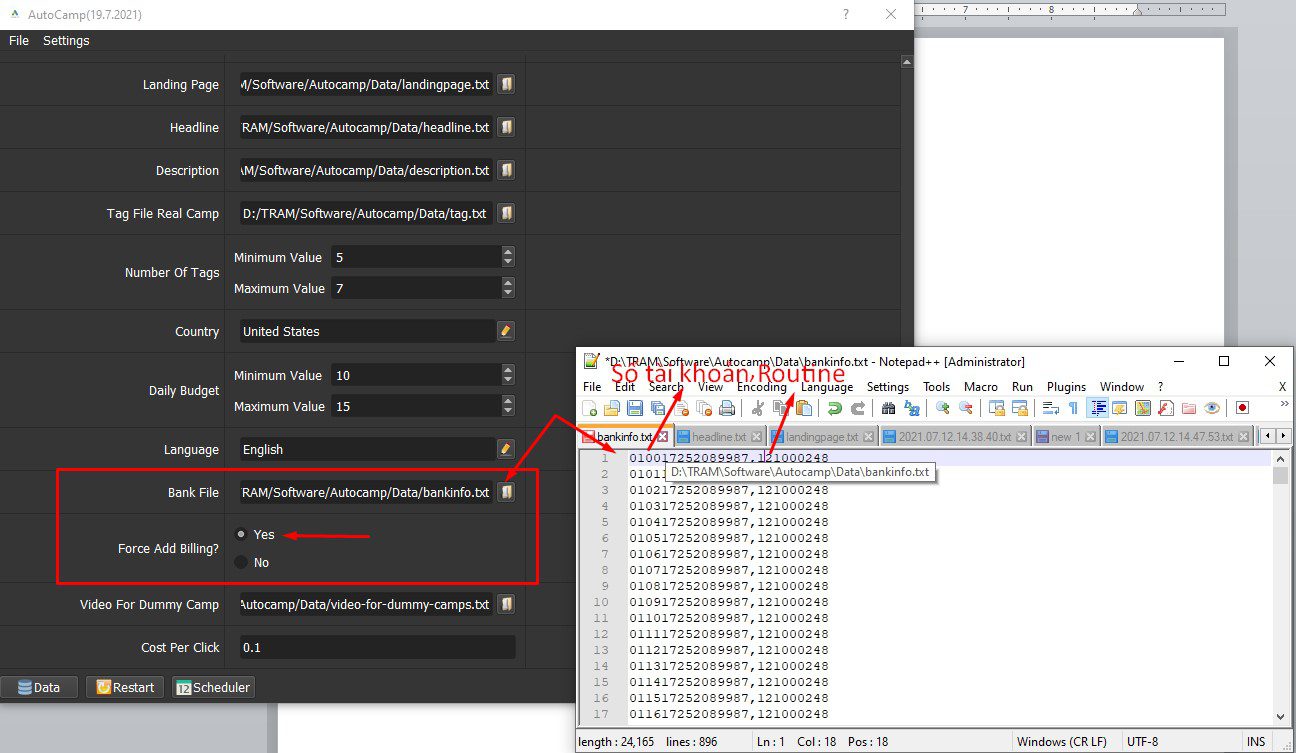
Create a text file containing the bank card information. Bank card file format is “account number, routine number”.
Choose Yes in the Force Add Billing section to run the function of adding a bank card.
A22. Video Dummy Camp
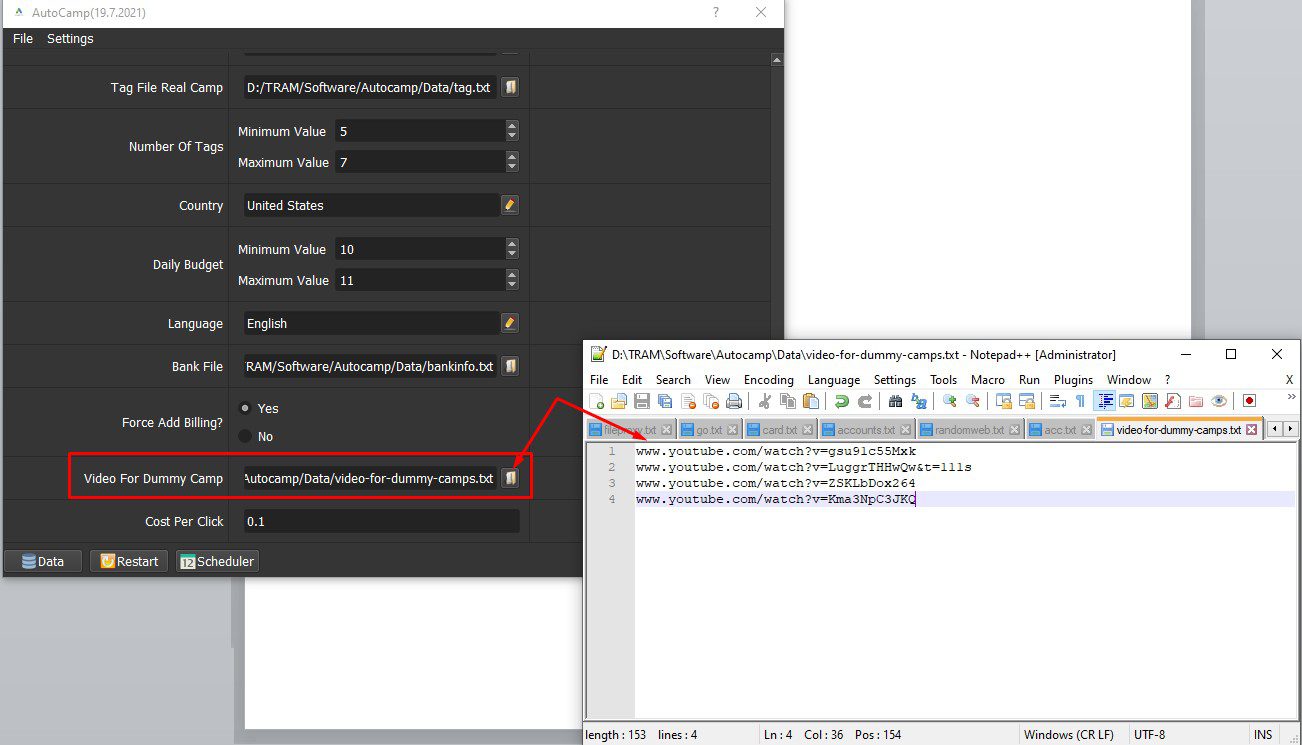
Create a text file containing links of videos that you want to run dummy camp.
Click ![]() ==> select the text file containing links of videos.
==> select the text file containing links of videos.
Note: Delete “https://” in links of videos.
B- How To Run the AutoCamp Software?
B1. REG GGA
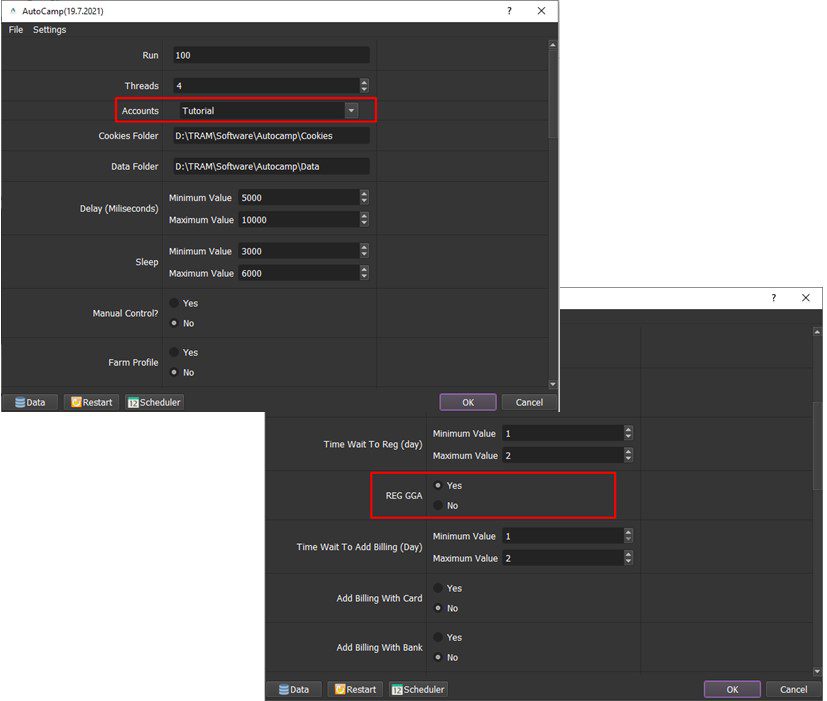
In the Account section, enter the Gmail files to create an account (tutorial in section A3). Then, click Yes in the Reg GGA section.
B2. Farm Profile
After creating Google Ads accounts, you need to perform the function of raising Google Ads accounts to make them better.
Select Yes in Farm Profile.
In Random Webs, do the same as tutorial in A16. Click OK to run.
B3. DUMMY CAMP (CAMP VIDEO)
At Dummy Camp, select Yes.
At Video For Dummy Camp, you enter the file containing the links of the videos, you set the language and advertising budget for this campaign (find out in sections A19; A20).
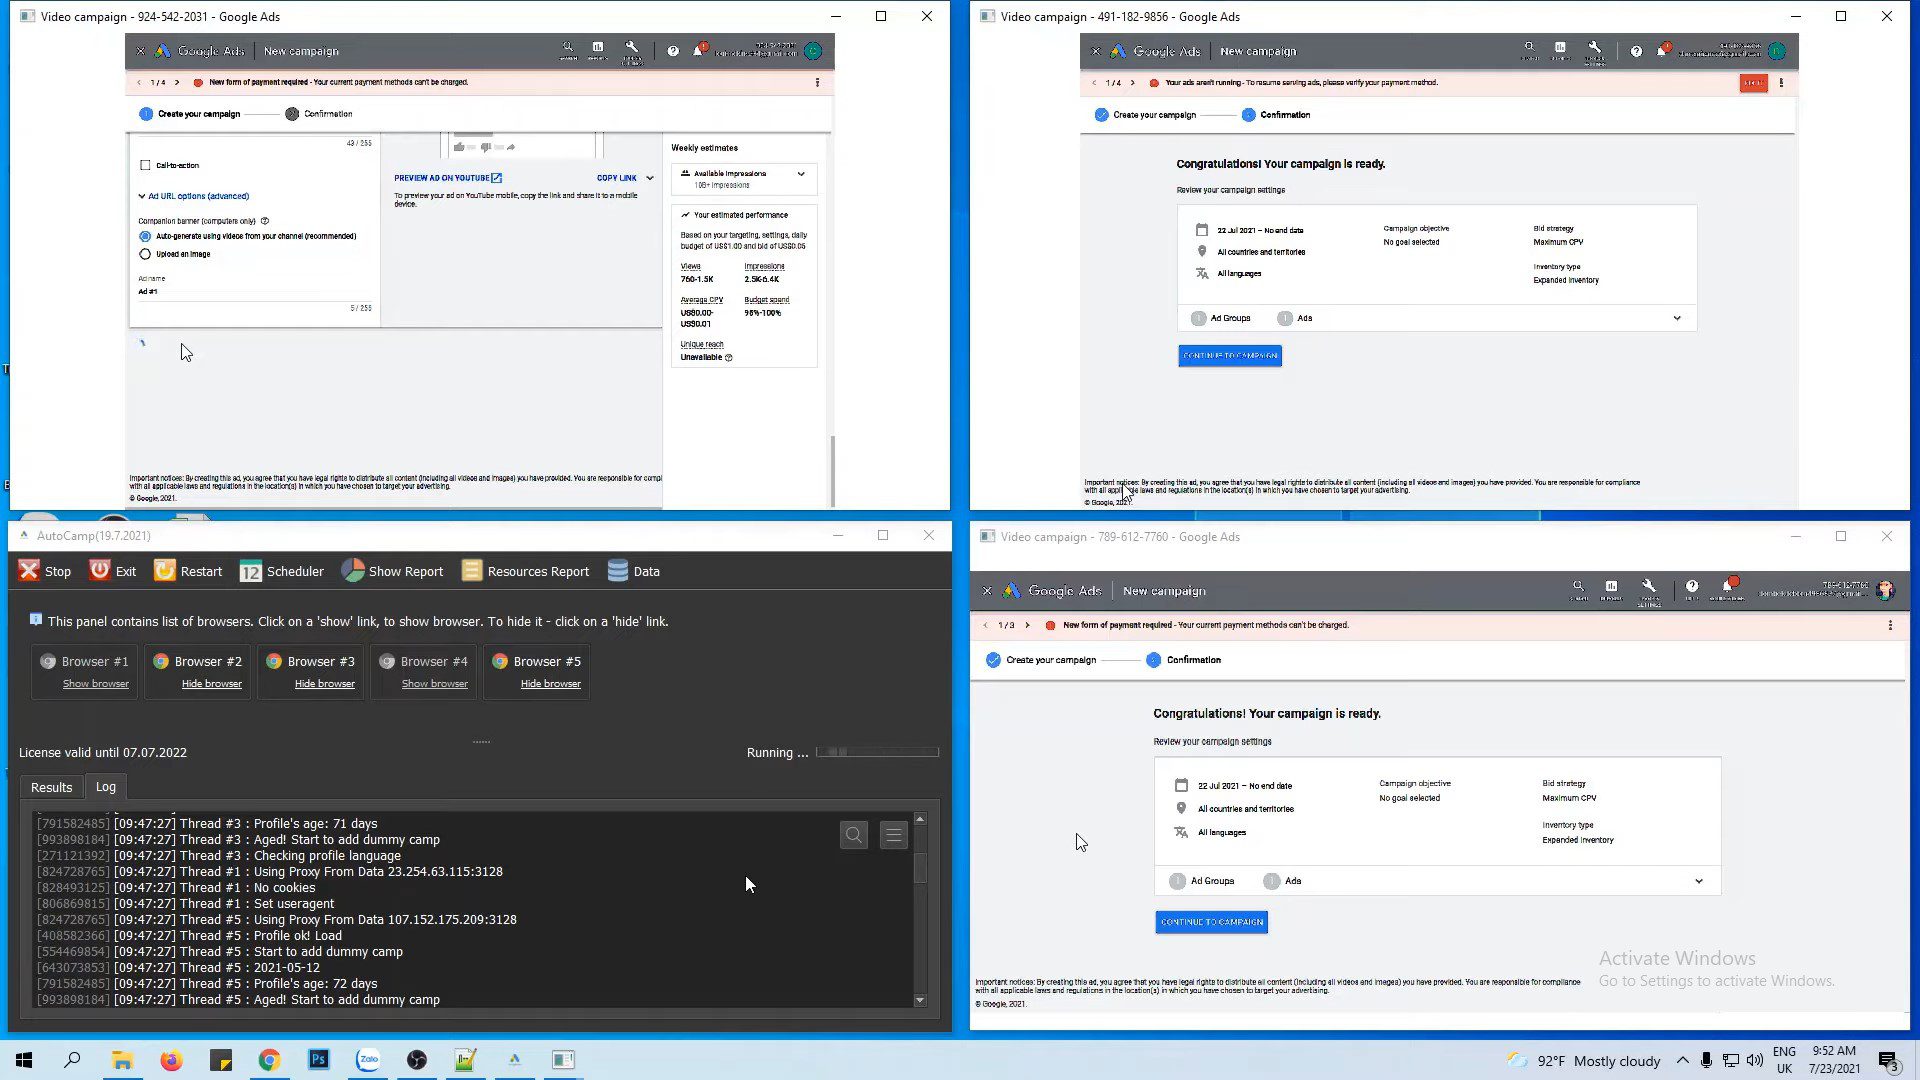
Click OK to run.
Note: Google Ads accounts need to farm (tutorial in A12 – Time Wait Dummy Camp section).
B4. REAL CAMP (CAMP SEARCH)
In the Real Camp section, select Yes.
Check the language budget, landing page, healing, description, tag (tutorial in A18; A19; A20).
Note: Tutorial on how to Farm Google Ads accounts in A12 – Time Wait Dummy Camp.

How much does AutoCamp cost?


